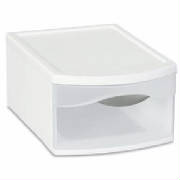
logonew.gif

Light Box

Home
Sensory Explorations
Activities
Science Activities
Concoctions
Recyclables
Hints & Tips
Laughing Out Loud!
Links
About Brighteyes Learning
Newsletter
lightboxdrawer.jpg

Please scroll down to view the notes.

Materials:


(Sterilite) storage drawer

Utility knife or craft knife (exacto)

Plexi glass (find at Menards, Home Depot)

Craft glue****

Light (under cabinet style or similar style utility light*)

White contact paper(optional)

Velcro (to attach light)


*Notes

* If using a utility light make sure it has a stay cool base and bulb


**You can lay it over the outside edge or fit it to the inside edge. You may also need to cut the plexi glass to fit.


***You may want to put a weight on the edges to insure good contact (do not place in center)


****Craft glue works better than hot glue. The hot glue can peel off easier.


You can attach the plexi glass right on top of the drawer itself and avoid cutting the top off of the storage drawer. Just make sure your light has a switch that will be on the cord instead of directly on the light.

The light box can be used for tracing projects as well as for looking at xrays too.

Directions;


~Remove drawer from frame


~Run the craft knife along the inside edge of the top of the drawer frame


~Keep repeating this until you cut through


~Remove top piece


~Fit a piece of plexi glass over the top**


~Place glue around the cut out frame


~Place plexi glass on top ***


~Allow to dry


~Remove handle


~Cut out center of handle with craft knife


~Replace handle


~Place light in center of drawer (use mounting squares)


~Thread cord through handle


~Peel small amount of contact paper and apply


~Smoothing out and peeling paper back as you go


~ keep light box materials inside drawer.

Still can't find what you were looking for? Have a comment or suggestion? Just fill out the form below and I will do my best to fill your request!

Name:
Email address:
Request
  

Copyright (c) 2005

The purpose of Brighteyes Learning is to be a resource for early childhood educators and parents. You are welcomed to use any materials found on the Brighteyes Learning sites. It is recommended that you read an activity completely and try it at least once before using in your classroom. Some activities may not be suitable for some people. These activities are to be used at your own discretion. Brighteyes Learning gives no guarantees. As always, it is the process not the product that counts! Brighteyes Learning is willing to adapt any activity for special needs, just email brighteyeslearning2@yahoo.com to request the adaptation.

All recipes located on the Brighteyes Learning sites are originals or adapted to the Brighteyes Learning format. All Rebus recipes are Brighteyes Learning originals that have been adapted from text recipes (as mentioned). Any product images, book images, character images associated with Brighteyes Learning recipes retain their original copyrights. Brighteyes Learning does not claim these as their own.

Brighteyes graphic was listed as public domain as a tutorial. All other images contained on Brighteyes Learning sites are; collage images from Brighteyes Learning, public domain (under the condition of being freely shared never sold), photobucket, cloverkids.com, free graphics.com, DiscoverySchool.com, nvtech.com. science graphic is from http://www.garyharbo.com/free.html In some instances, original author is unknown (as is the source). Every attempt has been made to find the original author of an image. Every attempt is made to give proper credit to an image. If you find an image that is your own original (copyrighted) piece of work, please contact Brighteyes Learning at brighteyeslearning2@yahoo.com. Brighteyes Learning will give proper credit or remove image as per owner’s request.


"Clip art licensed from the Clip Art Gallery on DiscoverySchool.com"

gen.jpg