logonew.gif

Paper Mache` Tree

Home
Sensory Explorations
Activities
Science Activities
Concoctions
Recyclables
Hints & Tips
Laughing Out Loud!
Links
About Brighteyes Learning
Newsletter

newback.gif

As with any project the more you do something you find easier and or more efficient ways of doing things. The following is an updated version and I feel looks a lot better than the first.


We have our tree located in our reading area. Who could resist sitting under a tree to read?!

tree3.jpg

Materials:

Cardboard box or chicken wire

Wrapping paper tubes

An abundance of newspaper

Flour

Water

Pail

Paint stick / whisk

2 umbrellas (Dollar Tree stores are a great place for these)

Green paper

Scraps of green paper

Hot glue

Plastic bags or floor covering to work on

Optional: Vinyl gloves

Paint (some shade of brown)

Optional: Green paint for tree top

Paper Mache’ Tree

  1. Shape your box or chicken wire into a rough trunk shape
  2. If using chicken wire fashion branches and attach with wire ties

·        If using cardboard and wrapping paper tubes cut holes near the top and fit tubes into holes. Seal with hot glue about 1”inch thick and wide.

  1. Prepare paper mache’ paste (flour and water to a consistency of syrup)
  2. Tear newspaper into manageable pieces
  3. Apply 2 layers of paper mache’ & newspaper to form the trunk & branches of tree
  4. Allow to dry for 2-5 days (depending on the thickness and temp. of where your making it)
  5. Roll long strips of newspaper crumpled up to form bark and apply the same way as base.
  6. Allow to dry.
  7. Paint

HINTS: If your tree leans add more newspaper and paper mache’ to opposite side.

Leave tops of branches opened to insert treetop later.

The last two trees my classes have made were free standing, however you may want the extra security of a Christmas tree stand (which can be covered with a tree skirt made from Astro turf.).

Tree Top

2 umbrellas (Dollar Tree Stores is where we purchased ours)

Leaves cut out of construction paper

Glue

  1. Depending on how many branches you have you may choose to use more or fewer umbrellas.
  2. Cut out leaves and glue to umbrellas top.
  3. For leaves on the underside of the umbrellas use cut scraps of green (construction) paper and glue onto the underside. 
  4. If handle is too thick to insert into tree, Break off handle (fairly easy to do LOL) and insert into top of branches of tree.

T opics / Questions:
 
The following are topics and questions to consider during this project.
 
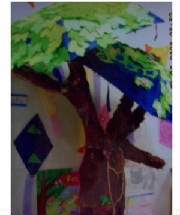
Before starting-- Talk about the life cycle of trees, the seasons, the parts of the tree { bark, sap, leaves, branches, etc.}, and / or how a tree grows.
 
Plan out how you will make the tree.
 
Talk about the materials you will need and use.
 
During-- Talk about the how the past feels
 
Have the children describe what they are doing, do they like the way the paste feels? 
 
Have them talk about the process -- how the tree has changed from begining through the end.
 
Talk about why each layer needs to dry
 
Ask them how they want to do each step.
 
Remember this is their project and you are only helping.
 
These are only suggestions to get you started.


Still can't find what you were looking for? Have a comment or suggestion? Just fill out the form below and I will do my best to fill your request!

Name:
Email address:
Request
  

Copyright (c) 2005

The purpose of Brighteyes Learning is to be a resource for early childhood educators and parents. You are welcomed to use any materials found on the Brighteyes Learning sites. It is recommended that you read an activity completely and try it at least once before using in your classroom. Some activities may not be suitable for some people. These activities are to be used at your own discretion. Brighteyes Learning gives no guarantees. As always, it is the process not the product that counts! Brighteyes Learning is willing to adapt any activity for special needs, just email brighteyeslearning2@yahoo.com to request the adaptation.

All recipes located on the Brighteyes Learning sites are originals or adapted to the Brighteyes Learning format. All Rebus recipes are Brighteyes Learning originals that have been adapted from text recipes (as mentioned). Any product images, book images, character images associated with Brighteyes Learning recipes retain their original copyrights. Brighteyes Learning does not claim these as their own.

Brighteyes graphic was listed as public domain as a tutorial. All other images contained on Brighteyes Learning sites are; collage images from Brighteyes Learning, public domain (under the condition of being freely shared never sold), photobucket, cloverkids.com, free graphics.com, DiscoverySchool.com, nvtech.com. science graphic is from http://www.garyharbo.com/free.html In some instances, original author is unknown (as is the source). Every attempt has been made to find the original author of an image. Every attempt is made to give proper credit to an image. If you find an image that is your own original (copyrighted) piece of work, please contact Brighteyes Learning at brighteyeslearning2@yahoo.com. Brighteyes Learning will give proper credit or remove image as per owner’s request.


"Clip art licensed from the Clip Art Gallery on DiscoverySchool.com"

gen.jpg